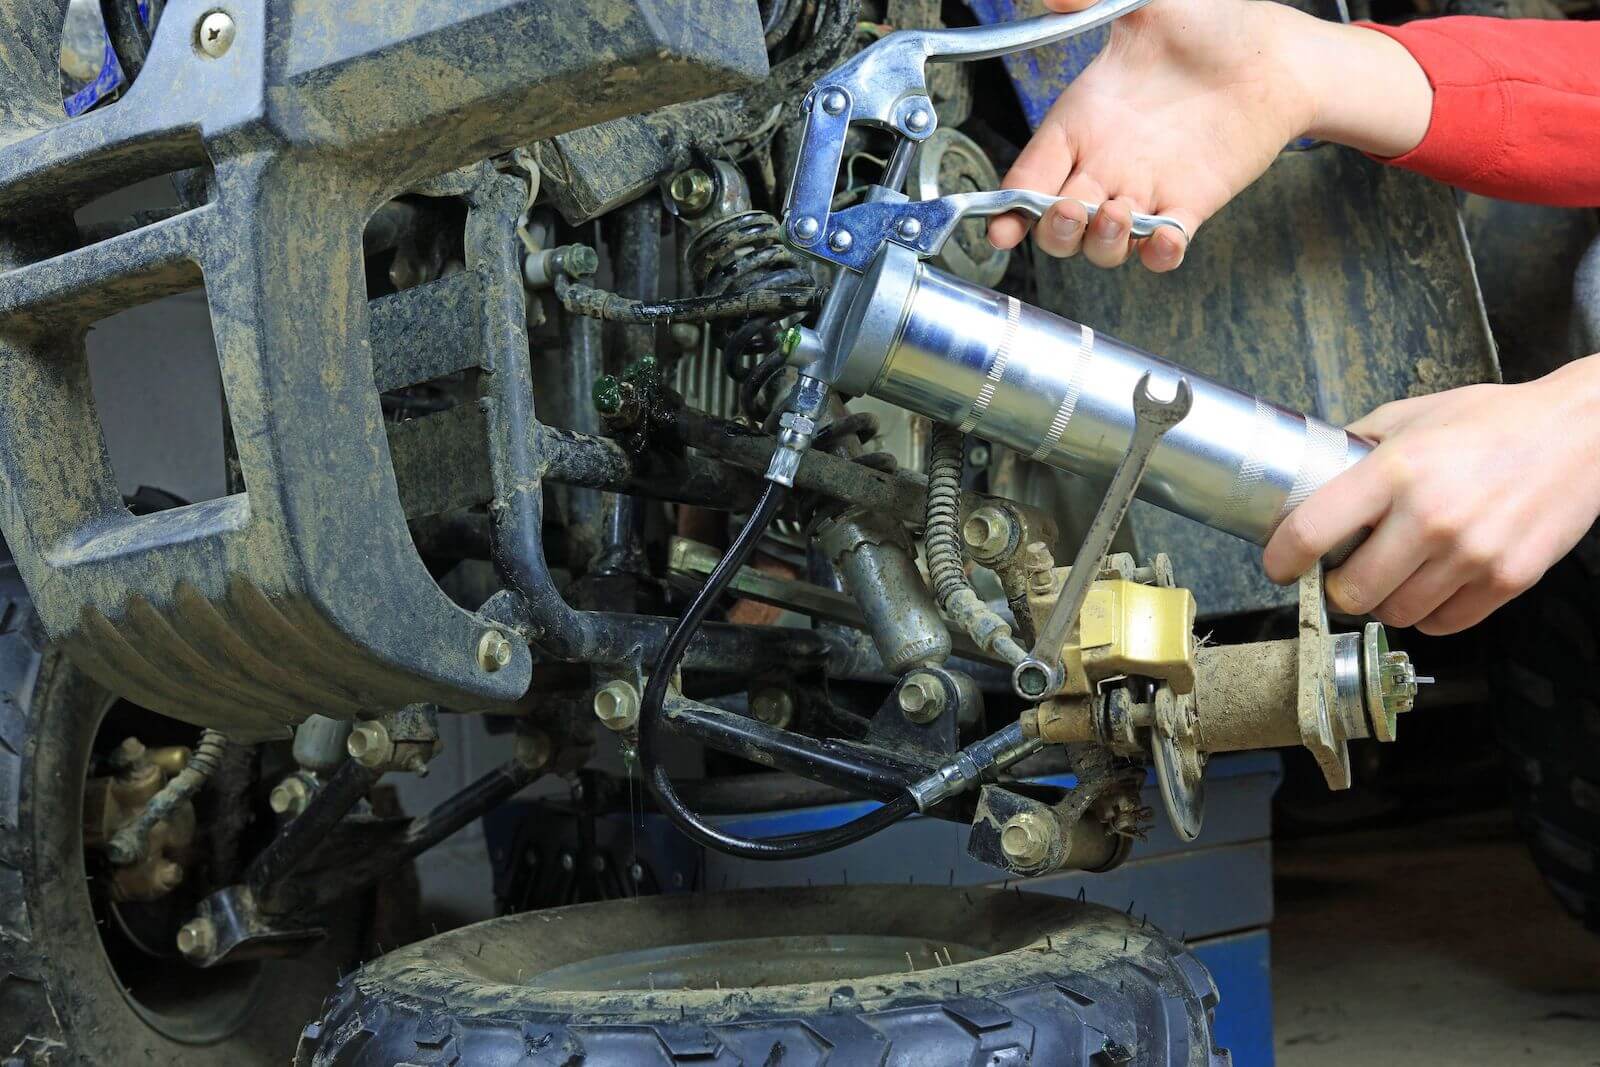
Winterizing a boat means protecting its engine, fuel system, cooling and freshwater systems, batteries, exposed hardware, and trailer before freezing weather and long-term storage. One step deserves more attention than it usually gets: locate every zerk fitting identified by the manufacturer and lubricate it with a grease approved for that application. Fresh grease helps leave those service points protected during months of inactivity.
Boat designs and winterization procedures vary. Use this checklist to organize the job, but follow the owner or service manuals for your exact boat, engine, sterndrive, outboard, generator, and trailer. Those manuals control the required lubricant, quantity, service interval, torque, fluid capacity, fogging method, and freeze-protection procedure.
What you need to know before winterizing
- Complete the work before the first hard freeze.
- Gather the manuals and build a model-specific checklist before draining fluids or running the engine.
- Stabilize and service the fuel system exactly as the engine manufacturer directs.
- Change engine oil, gearcase or drive lubricant, filters, and other service items at the specified interval.
- Drain or protect every water-containing system according to its manufacturer.
- Grease every manufacturer-specified zerk fitting on the engine, steering system, drive, boat hardware, and trailer.
- Use the grease specification in the applicable manual. “Marine grease” is not a substitute for confirming the required NLGI grade, thickener system, and application approval.
- Do not mix greases unless compatibility is supported by the equipment or lubricant manufacturer.
Boat winterization tools and materials
Your exact list will depend on the boat. Common items include:
- Owner and service manuals for the boat, engine, drive, generator, and trailer
- Required engine oil, gear lubricant, filters, seals, and drain-plug gaskets
- Manufacturer-approved fuel stabilizer and fogging or storage oil, when specified
- Grease gun, clean coupler, shop towels, and the specified grease
- Marine or potable-water antifreeze only where the applicable manual calls for it
- Drain pans and labeled containers for used fluids
- Battery tools and an approved charger or maintainer
- Cleaning supplies, corrosion-protection products, and a breathable storage cover
- Eye protection, gloves, wheel chocks, and any required lockout or support equipment
Never run an engine without the cooling-water supply required by its manufacturer. Do not work under an unsupported drive, engine, trailer, or raised component. Fuel, batteries, pressurized grease, moving machinery, and winterization chemicals require the safety procedures stated in the relevant manuals and product labels.
A practical boat winterization checklist
1. Inspect the boat before storage
Wash the hull, deck, bilge, engine exterior, and trailer so existing leaks, corrosion, fishing line, cracked hoses, damaged wiring, and loose hardware are easier to see. Let cleaned areas dry before covering the boat.
Record problems now instead of discovering them at launch. If you find milky or foamy gear lubricant, damaged seals, fuel leakage, steering problems, freeze damage, or significant corrosion, stop and have the system inspected by a qualified marine technician.
2. Treat the fuel system as the engine manufacturer directs
Fuel-tank level, stabilizer dosage, filter service, and engine-running procedures differ among manufacturers and fuel-system designs. Use the specified stabilizer and follow the label and engine manual. When the procedure requires treated fuel to circulate, use the exact operating method and cooling-water supply prescribed by the manufacturer.
Do not improvise a portable-tank, fogging, or fuel-line disconnection procedure. Those steps are model-specific and involve fire, vapor, and moving-engine hazards.
3. Change required oils, lubricants, and filters
Storage preparation commonly includes engine-oil and filter service plus inspection or replacement of gearcase or drive lubricant. Yamaha's published four-cylinder outboard procedure, for example, includes engine oil and filter service and fresh gearcase lubricant. Your engine may require a different sequence, quantity, lubricant, fill direction, gasket, or torque.
Inspect drained lubricant as directed by the manufacturer. Evidence of water contamination or metal debris calls for diagnosis before storage—not simply refilling the unit and postponing the repair.

4. Protect the engine and cooling system from freezing
Outboards, sterndrives, raw-water-cooled inboards, closed-cooled engines, generators, and air-conditioning systems do not share one winterization method. Drain, flush, position, and freeze-protect each system exactly as its manufacturer specifies.
Some engines require fogging or another internal storage treatment; others use a model-specific method. Do not spray a product into an engine or run antifreeze through a cooling system unless the manufacturer publishes that procedure for the equipment.
5. Drain and protect onboard water systems
Address freshwater tanks, pumps, water heaters, washdowns, livewells, baitwells, heads, holding tanks, showers, ice makers, and other water-containing equipment. Bypass and drain components where the manufacturer instructs, and use only a product approved for the particular system.
Never assume that draining one faucet empties the entire boat. Low points, pumps, strainers, heat exchangers, and valves may retain water.

6. Grease every manufacturer-specified zerk fitting
Do not put the grease gun away after servicing one obvious fitting. Use the manuals to make a complete lubrication-point list, then work through it methodically. Depending on the boat and equipment, specified grease points may include:
- Outboard steering-slide and steering-pivot fittings
- Tilt, swivel, or shift-linkage fittings
- Sterndrive or inboard service points identified in the drive manual
- Trailer suspension, hinge, jack, or coupler fittings where grease service is specified
- Other pins, pivots, and bearings equipped with serviceable zerks
Yamaha's published four-cylinder outboard winterization procedure specifically includes lubricating all grease fittings and identifies fittings at the steering slide, steering column, and shift mechanism on the covered engine family. Locations differ by model, so use that example as evidence that greasing belongs in winterization—not as a universal fitting map.
Before attaching the coupler, wipe dirt, salt, and old grease from the zerk. Use a clean grease gun charged with the lubricant required by the component manufacturer. Apply only the specified amount. If the fitting will not accept grease, the coupler leaks excessively, or a seal begins to move or bulge, stop. Do not force a blocked fitting with uncontrolled pressure.
Wipe away displaced grease and inspect what exits the joint when the service procedure allows purging. Water, rust, debris, or abnormal material can signal a fitting or component that needs closer inspection.
Which grease should you use before boat storage?
The best choice is the grease that satisfies the equipment manufacturer's specification and the actual exposure at that fitting. For many boat owners, AET Systems offers two relevant Lube-Shuttle® options.
SeaGuard SG-145: the stronger marine recommendation
AirTec Lube-Shuttle® SG-145 SeaGuard Marine Grade Grease is the more application-specific recommendation for boat and trailer fittings exposed to fresh water, salt water, humidity, or intermittent submersion—provided it matches the equipment manufacturer's requirement.
The current product page publishes these characteristics:
- Marine-rated for boats and equipment exposed to fresh and salt water
- NLGI grade 2
- Calcium thickener and mineral base oil
- Very tacky texture
- Intended for pivot points and fittings exposed to moisture
- Published applications include boats and trailers subject to submersion
That combination makes SeaGuard SG-145 the first product to evaluate for wet marine service and winter storage. The tacky formulation is designed to stay in place, which is especially relevant when fittings face washdown, humidity, and water exposure.
G200EP-2: a broad multi-purpose option
AirTec Lube-Shuttle® G200EP-2 Multi-Purpose Plus is a versatile alternative for recreational equipment and other grease points where its published properties and the OEM requirement align.
The current product page publishes:
- NLGI grade 2
- Calcium sulfonate complex thickener and mineral base oil
- Extreme-pressure and anti-wear additive systems
- Water-resistant formulation
- Heavy base-oil viscosity for durable lubrication
- Applications that include recreational equipment
G200EP-2 is a practical choice when you want a durable, water-resistant multi-purpose grease across compatible equipment. For fittings that regularly see salt water, fresh water, heavy spray, or trailer submersion, SeaGuard SG-145 is the more directly marine-focused recommendation.
Do not switch or mix grease by color
Grease color does not identify its thickener, base oil, NLGI grade, compatibility, or performance. SeaGuard SG-145 and G200EP-2 also publish different thickener descriptions. Before changing products, confirm thickener and base-oil compatibility and follow the equipment or lubricant manufacturer's changeover procedure. If compatibility is unknown, do not simply pump new grease on top of the old grease.
Why use the Lube-Shuttle® system?
The grease still has to meet the equipment specification; cartridge design does not make an unsuitable grease suitable. Once you have selected the right grease, however, the Lube-Shuttle® system makes the maintenance side cleaner and simpler.
The cartridge threads directly into a compatible Lube-Shuttle® grease gun. The current Lube-Shuttle® site describes loading as removing the cap, pushing up the plunger, threading in the cartridge, and starting to grease. Because the cartridge is threaded into the tool rather than installed inside a conventional gun barrel, you can see the grease label and the remaining cartridge quantity while you work.
That visibility matters during boat winterization. It is easier to keep a dedicated marine grease clearly identified, avoid grabbing an unmarked tube, and tell whether enough grease remains to complete the engine, steering, trailer, and other specified fittings. The system also avoids opening the grease-gun barrel for a routine cartridge change.
Lube-Shuttle® does not eliminate the need to clean zerks, use the correct coupler, prevent contamination, or verify grease compatibility. It simply provides a more controlled cartridge-handling system once the correct product has been chosen.
7. Service the batteries and electrical system
Follow the battery manufacturer's storage instructions. Depending on battery chemistry and the boat's electrical system, that may include disconnecting, charging, maintaining, or removing batteries. Clean and protect terminals only with approved products, and make sure automatic bilge-pump requirements are addressed if the boat remains in the water.
8. Protect the trailer
Inspect tires, wheel hardware, brakes, lights, wiring, safety chains, winch components, bunks or rollers, coupler, jack, and any manufacturer-specified grease points. Wheel-bearing and bearing-protector service is not the same as casually pumping every visible fitting full of grease. Follow the axle or hub manufacturer's procedure and quantity guidance to avoid seal damage or brake contamination.
9. Dry, ventilate, and cover the boat
Remove food, wet gear, valuables, and any item that can trap moisture. Clean and dry lockers, cushions, canvas, and the bilge. Position the boat and cover so water cannot pool, while maintaining the ventilation recommended for the boat and cover system.

Final verification before storage
Walk around the boat with your written checklist and confirm:
- Every manual-required winterization step is complete.
- Every manufacturer-specified zerk fitting is marked off and wiped clean.
- Fluid drains and plugs are in the storage position required by the manual.
- Fuel and electrical systems are left in their specified storage condition.
- Water systems are drained or protected.
- Batteries are on the correct storage plan.
- Repairs needed before launch are documented.
- The boat and trailer are supported, secured, ventilated, and covered correctly.

Frequently asked questions
Should I grease boat fittings before or after winter storage?
Complete the manufacturer-required lubrication service before storage so the specified points go into the layup period with fresh grease. Inspect and service them again at spring commissioning when the maintenance schedule calls for it.
Should every zerk fitting receive grease?
Grease every zerk fitting identified for routine service by the applicable manufacturer. Do not assume every plug or fitting is a grease point, and do not force grease into a blocked fitting or past a moving seal.
Is SeaGuard SG-145 or G200EP-2 better for a boat?
SeaGuard SG-145 is the more directly marine-focused choice for compatible fittings exposed to water, humidity, spray, or submersion. G200EP-2 is the broader multi-purpose option for compatible recreational and general equipment applications. The OEM grease requirement decides whether either product is appropriate.
Can I mix SeaGuard SG-145 with the grease already in my boat?
Not without compatibility support. Check the existing grease's thickener and base oil against the new product and follow the equipment or lubricant manufacturer's changeover procedure.
Does winterizing an outboard also winterize the rest of the boat?
No. The fuel, freshwater, sanitation, bilge, batteries, electronics, accessories, trailer, and storage environment may each require separate attention.
Give every fitting attention before the cover goes on
Build the fitting list from your manuals, grease each specified zerk with the correct long-lasting lubricant, and record the work. For water-exposed marine fittings, evaluate SeaGuard SG-145 first. For compatible general-purpose points, consider G200EP-2. Pair either grease with a Lube-Shuttle® gun when you want cleaner cartridge changes and clear grease identification during the job.